Posts here are mostly step-by-step guides on how to replicate something I have set up in the past. Read over my About page to see how I show commands/output and read the disclaimer.
Where do you store your code projects – Github? What about private projects…do you pay for private repos? You can have more control over your projects and even configure automated tests and builds – all using open source software! Fire up your spare hypervisor and read on to learn how to build your own dev project host!
System Build Features
- Gitlab Community Edition – option to use Enterprise Edition, learn more about the differences
- Gitlab Runners – Continuous Integration (CI) / Continuous Deployment (CD), Auto build, test, deploy code on commits.
- Docker Registry – Integrated with Gitlab, store Docker builds right in the repository, useful for CI/CD jobs
Choosing Hardware (or not)
The hardware required is something that supports virtual machines. We are going to need three total VMs with 8GB total memory and maybe 128GB disk space. One machine for Gitlab, and two for the runners. The reason being is that Gitlab strongly discourages installing Gitlab and runners on the same OS. Also I’ve noticed that Gitlab is a memory hog, even with one active user. So I want to separate the machines to keep memory usage in strict control.
If you don’t have any spare hardware, your main desktop/laptop can work for a temporary solution. On my main Windows desktop, there are usually a random collection of tinker machines…

I try to keep these VMs to a temporary basis because using a primary desktop/laptop will not have the always-on uptime, useful for any hosted service. Also there are annoyances like Windows 10/11 rebooting in the middle of the night, taking down all the hosted VMs in the process.
If you already have a hypervisor setup or want to do it differently, skip the Hypervisor Setup and Hypervisor Networking sections.
Hypervisor Setup
Ok, time to get started.
Install Xubuntu 16.04 on a base system. Customize it to your liking, installing base packages, setting up users, passwords, vim profiles, etc. I’m recommending doing a GUI on the base system so it’s easy to install the guest images.
Do a quick check to make sure your CPU supports KVM.
[root]$ apt-get install cpu-checker
[root]$ kvm-ok
INFO: /dev/kvm exists
KVM acceleration can be used
Now install the kvm software.
[root]$ apt-get install qemu-kvm libvirt-bin virtinst bridge-utils
Hypervisor Networking
Find the name of your primary network device, or the device with your LAN’s IP address assigned to it. These days Ubuntu makes up some strange ones like enp8s0.
[root]$ ifconfig
enp8s0    Link encap:Ethernet  HWaddr 28:d2:44:0e:31:fb
          inet addr:10.25.1.156  Bcast:10.25.1.255  Mask:255.255.255.0
          ...
Edit the /etc/network/interfaces to include this adapter and a bridge setup.
[root]$ vim /etc/network/interfaces
Remove anything that refers do the primary ethernet device, and add this (replace enp8s0 with your ethernet device):
auto enp8s0
iface enp8s0 inet manual

auto br0
iface br0 inet dhcp
   bridge_ports enp8s0
   bridge_stp on
   bridge_fd 0.0
XFCE uses a network manager by default, but we don’t want it. Purge it.
[root]$ apt-get purge network-manager
Now reboot and hold your breath. Make sure network access still works after the reboot. If configured correctly, the DHCP-assigned address should move to the bridge:
[user]$ ifconfig
br0       Link encap:Ethernet  HWaddr 28:d2:44:0e:31:fb
          inet addr:10.25.1.156  Bcast:10.25.1.255  Mask:255.255.255.0
          inet6 addr: fe80::2ad2:44ff:fe0e:31fb/64 Scope:Link
          UP BROADCAST RUNNING MULTICAST  MTU:1500  Metric:1
          ...

enp8s0    Link encap:Ethernet  HWaddr 28:d2:44:0e:31:fb
          inet6 addr: fe80::2ad2:44ff:fe0e:31fb/64 Scope:Link
          UP BROADCAST RUNNING MULTICAST  MTU:1500  Metric:1
          ...
KVM Guests
One step closer to installing some application software, but not there yet! If you installed a GUI, launch virt-manager. Otherwise, VMs can be created from the command-line.
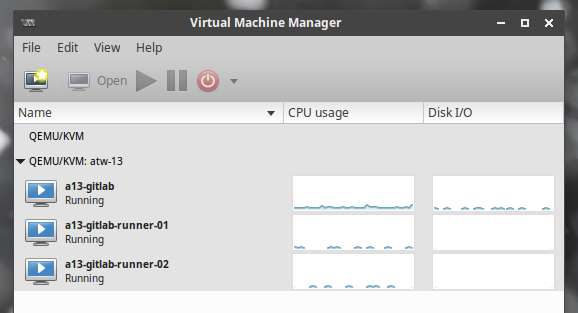
Create three new VMs – one for Gitlab, and two for runners. When I do my hostnames, I will make all the guests include an abbreviation of the host server. Here I have atw-13 for the host, and a13-* for each of the guests.
Assign at least 4GB RAM / 64GB disk to Gitlab and 1GB RAM / 16GB storage to the runners.
These guest VMs do not need a GUI. Just do a basic Ubuntu server.
Choose a URL and SSL Cert
I know this is an internal setup, but the Docker registry assumes SSL access, and browsers these days really complain when logging into a non-SSL site. So we should go through the pain of installing one.
Choose a FQDN to use for the Gitlab server and the Docker registry. Configure the DNS on your network accordingly, and provision the SSL cert. I have an SSL gateway on my network that is used to generate the cert, but you can do it however you please. If the cert is generated off-site, it will still need to be on the Gitlab host for the Docker registry (more on that later).
Gitlab Installation
Log into the Gitlab VM and install Gitlab. Follow their detailed guides or my simplified one here.
Select Internet Site when prompted, and update EXTERNAL_URL to your actual URL; leave it at HTTP for now
[root]$ apt-get install -y curl openssh-server ca-certificates postfix
[root]$ curl https://packages.gitlab.com/install/repositories/gitlab/gitlab-ce/script.deb.sh | sudo bash
[root]$ EXTERNAL_URL="http://git.dev.wellsie.net" apt-get install gitlab-ce
Log into your new Gitlab server to make sure it’s working and to set an initial password. Once that’s working, continue on to configuring SSL and the Docker registry.
Gitlab Config Tweaks
Generate the SSL cert and copy them to the Gitlab host.
SSH into the Gitlab server and edit the config. The original config has useful comments. Read them if you wish, but I like to simplify things by removing them. Save the original file, then consider using my simplified version.
[root]$ mv /etc/gitlab/gitlab.rb /etc/gitlab/gitlab.rb.comments
[root]$ vim /etc/gitlab/gitlab.rb
Here is my config. I copied a cert from my gateway, so the paths are a bit different. Adjust as necessary.
nginx['redirect_http_to_https'] = true

external_url 'https://git.dev.wellsie.net'
registry_external_url 'https://registry.dev.wellsie.net'

nginx['ssl_certificate'] = "/etc/letsencrypt/live/git.dev.wellsie.net/fullchain.pem"
nginx['ssl_certificate_key'] = "/etc/letsencrypt/live/git.dev.wellsie.net/privkey.pem"

registry_nginx['ssl_certificate'] = "/etc/letsencrypt/live/git.dev.wellsie.net/fullchain.pem"
registry_nginx['ssl_certificate_key'] = "/etc/letsencrypt/live/git.dev.wellsie.net/privkey.pem"

prometheus_monitoring['enable'] = false
sidekiq['concurrency'] = 15
postgresql['shared_buffers'] = "256MB"
Save and exit from the editor. Then run the reconfigure tool.
[root]$ gitlab-ctl reconfigure
If all works out, then you should be able to access Gitlab through SSL. Yay!
Take a Break; Enjoy the Progress
Take a few minutes to tinker with Gitlab, setting up some users, groups, repositories, etc. You can also tinker with the integrated Docker registry, although the real wow factor of that feature doesn’t come to light until we setup CI/CD, which needs the runners to be installed.
Runner Configuration
SSH into the first runner VM and install Gitlab Runner:
[root]$ curl -L https://packages.gitlab.com/install/repositories/runner/gitlab-runner/script.deb.sh | bash
[root]$ apt-get install gitlab-runner
To register the runner, follow this guide, with some items to note:
- Name it something that involves the hostname and ‘docker’ (eg “a13-runner-01-docker”)
- Use at least the two tags: [hostname], and ‘docker’ (eg “a13-runner-01,docker”)
- The Runner executor for this one is (you guessed it):
docker
Now run this register command again. Run through the prompts again, replacing ‘docker’ with ‘shell’.
When complete, the config file should look something like this:
[root@a13-runner-01 ~]$ cat /etc/gitlab-runner/config.toml
concurrent = 1
check_interval = 0

[[runners]]
  name = "a13-runner-01-docker"
  url = "https://git.dev.wellsie.net/"
  token = "a711a8c34efce2028fb682279e3542"
  executor = "docker"
  [runners.docker]
    tls_verify = false
    image = "alpine:latest"
    privileged = false
    disable_cache = false
    volumes = ["/cache"]
    pull_policy = "if-not-present"
    shm_size = 0
  [runners.cache]

[[runners]]
  name = "a13-runner-01-shell"
  url = "https://git.dev.wellsie.net/"
  token = "2147e133d0c075d2b4b72d812e610c"
  executor = "shell"
  [runners.cache]
Now log into the second runner and perform the same commands (don’t forget to use the correct hostname).
Docker and shell runners allow deployment operations to be ran both in Docker containers and plain shell for commands that are not compatible with Docker. Read more about additional available executors.
I run Docker commands inside of shell runners…it requires a bit of a security change that gives Docker access to the gitlab-runner user. There are plenty of security reasons to NOT do this, so be aware.
[root]$ usermod -aG docker gitlab-runner
When completed, go to your Gitlab homepage and hit the admin area icon at the top, then Runners on the left navigation. Check your list of runners with mine.

First Runner Test
Create a new project in your user namespace, call it test-01. This will land you on a new project page. Hit the + next to the checkout URL, and hit New File.
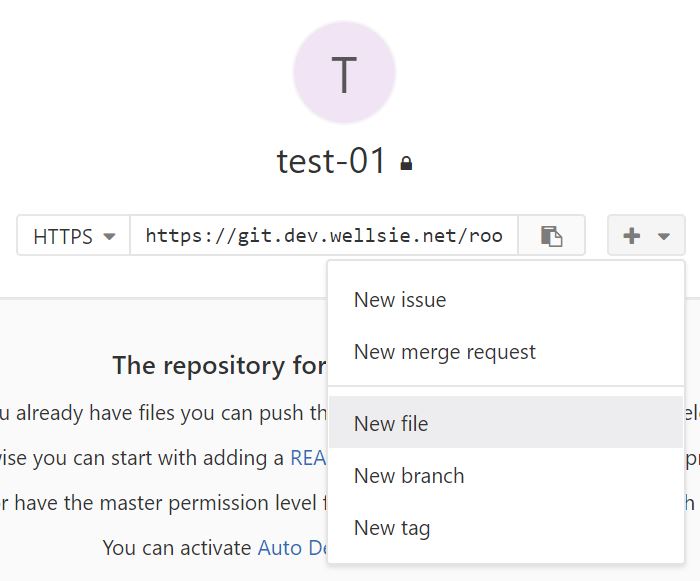
Give the file the name .gitlab-ci.yml
Add this to the file:
stages:
    - test
    - build

test:
    stage: test
    tags: [docker]
    image: golang:1.9
    script:
        - hostname
        - whoami
        - pwd

build:
    stage: build
    tags: [shell]
    script:
        - hostname
        - whoami
        - pwd
Now quickly hit CI/CD -> Pipelines from the left navigation. There should be one pipeline there and might still be running. Click on it to see the two jobs. As the jobs run, their icons will change. Click on one to see the job’s output.
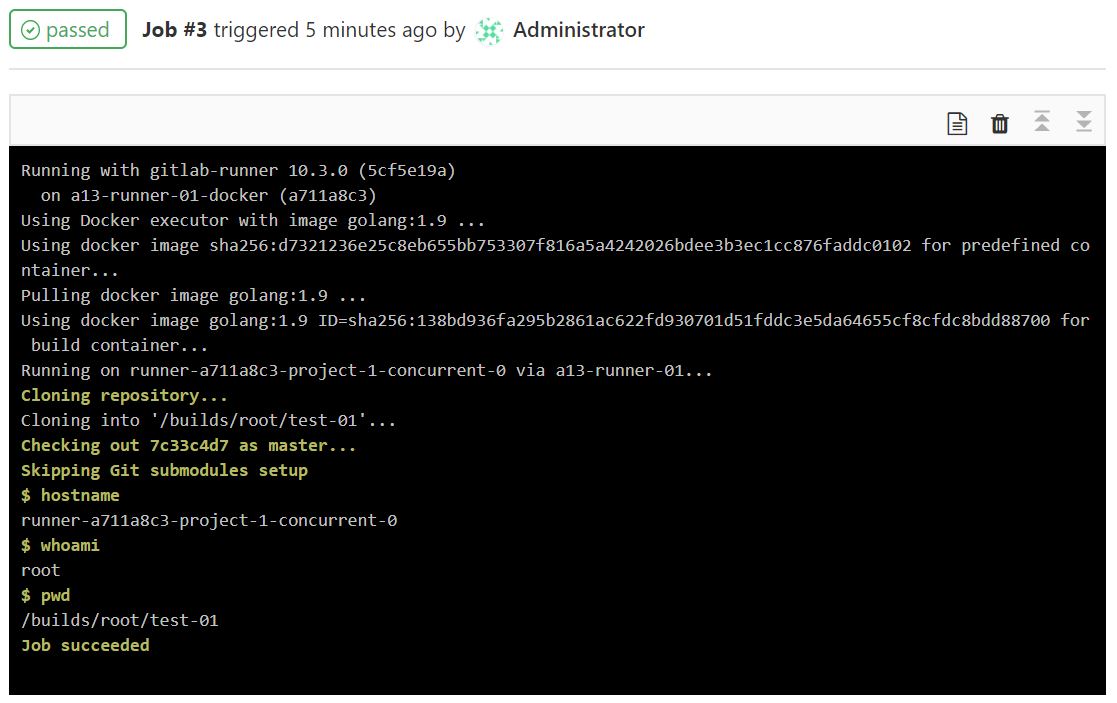
For fun, we ran some common commands to see what the environments are like. Note the user that a Docker runner uses compared to the shell runner.
Conclusion
Congratulations, you now have a hosted development environment to host your projects!
I can’t leave you using your shiny new dev environment without setting a backup policy. So please refer to the below two documents to backup the config and the repository data.
- https://docs.gitlab.com/omnibus/settings/backups.html#backup-and-restore-omnibus-gitlab-configuration
- https://docs.gitlab.com/ce/raketasks/backup_restore.html#creating-a-backup-of-the-gitlab-system
If I breezed over something, please feel to request clarification or ask questions in the comments.
Happy coding!